Friday, June 29, 2012

Happy Birthday Digi Challenge

Happy Friday - it's time for another free digi challenge at Digi Haven! This week's challenge is to use ANY free birthday digi you can find on a project. It can be a forever freebie, a limited time freebie, or a freebie during the duration of the challenge. The choice is completely yours! Make sure to always give credit when credit is due, and link back to the artist/site where you found the digi. :)

My birthday digi for this week's challenge came from the wonderful coloring pages of Elizabeth Dulemba - all of her images are SUPER adorable and her site is definitely a fav of mine when it comes to searching for free digis.


I tried to stick to using only the "basic" colors on my card since those were the colors in the background paper. Whenever I use a digi I always make sure it'll match whatever papers I'm using so that I can incorporate the colors from the paper onto the digi. The lighting in the picture dims the card down a bit, but it's definitely a more brighter, bolder card in person, I assure you. :)

Stop by the Digi Haven challenge blog to see what other birthday inspiration the design team has created. We'd love if you'd join us for this week's challenge! :)

Ashley

Thursday, June 28, 2012

Stamping With The Dragon Red, White, & Blue Challenge!

Stamping With The Dragon is going patriotic! This week's challenge theme is red, white, and blue

One lucky winner will receive their choice of two images from Stamping Dragon Designs by submitting a red, white, and blue card to this week's challenge!

For my challenge card, I decked Rupert out in some patriotic colors using the Independence Day image. I went with a slightly non-traditional red/blue combo, and used a turquoise blue rather than a royal blue, and a bit of a faded red rather than a bold red. I've been making a lot of patriotic cards lately and thought it might be fun to change things up a bit!


Make sure to stop by Stamping With The Dragon to see what patriotic inspiration the design team has in store for you!

Ashley


Thursday Craft 'n Chat - Reusing Scrap Papers

Welcome to this week’s edition of Thursday Craft 'n Chat. Every Thursday will feature a different crafty tip/technique from one of the Made Especially For You design team members. Click here to view last weeks tutorial on how to use Tim Holtz Distress Inks to create backgrounds.


Hello everyone ... it's Eileen here from the Scrapping Actuary!
Welcome to another Craft 'n Chat Thursday!

I am one of those scrappers that is always keeping every little bit of my scraps ... in fact, people are often giving me their scraps because they just don't know what to do with them!  I really enjoy the challenge of using up my scraps to make something wonderful ... I've even created cards with the barcodes that come on the various products I've bought (check it out here)!

So today I thought I'd share some simple ideas for ways that you can use your scraps to create some lovely cards!

Here is a sample of some of the scraps that I end up with after creating a layout or some cards. Now, most people I know would just throw these out ... but not me!


This card shows an example of how you can make use of any long strips that you have left over ... as you can see, I wrapped some twine around the strips and then used a left over sticker embellishment for my sentiment.


This gift card shows how I've used some wider & shorter strips to create the banners along the bottom half of the card.  In fact the cardstock used for this card was left over when I trimmed down a piece for a larger card ... don't forget that you can use your cardstock scraps to create cute little gift tags!


And finally ... when you are out of  strips of paper and you only seem to have random shaped pieces left, you can always use a tiny punch (like this butterfly punch) to create some embellishments.  I have even used tiny circle punches to create some fun cards with my scraps in the past too (check it out here).


Thanks for checking in today!
I hope that you've been inspired to craft with those scraps!


Eileen

Monday, June 25, 2012

Heat Embossing Challenge

It's technique week here at Made Especially For You! This week's challenge is to use the technique of heat embossing on a card.

I used the 3 Birds on Parade cartridge to make my challenge card for this week. The cute little birthday birdie is cut at 2.5" in with a white shadow. I paired him with some fun, cool-colored papers from the Bold Basics paper pad by Recollections added the heat-embossed 'Got Birthday?' sentiment and finished it off with the white bow and brads. :)


This week's challenge sponsor is the wonderful Adams Acres. One randomly chosen winner will win a $10 certificate to their store and also be offered a one-week guest designer position here at Made Especially For You. All participants also have a chance of being in the "top three" chosen by the design team and will receive a badge for their blogs. :) 

Don't forget, you can enter the challenge as many times as you want as long as each of your cards have their own post on your blog. :) We'd love for you to join us!

Ashley

Saturday, June 23, 2012

Do You Speak Cricut Saturday - Love You A Latte

Welcome to this week’s edition of Do You Speak Cricut Saturday. Every Saturday will feature a different Cricut cartridge review from one of the Made Especially For You design team members. This feature was added to the blog in order to give potential cartridge buyers a better idea of what each cart has to offer. Click here to view last week's Paper Doll Dress Up cartridge review.

Happy Saturday everyone, Karen from Simply Frenzied here for our weekly 
"Do You Speak Cricut Saturday".

My feature cartridge selection is the Cricut Lite "Love you a Latte".  
This cartridge is my go-to cartridge when I need to make a quick gift 
for a co-worker, teacher, or a little thank you.  
Combine your creation with a coffee gift card, a bag of loose leaf tea or coffee beans.  
I even think it would be great to wrap a fresh doughnut, create a tag and attach instant coffee or tea bag. Endless possibilities for gift giving with this cartridge.


It's not all about Latte's!  
This cartridge is perfect for the Coffee, Tea or Sweet Lover's in your life. 
Take a look at all the images included.


Retails for approximately $39.99
Works with all Cricut Machines
Includes Layer feature
50 layered images

What I especially like about this cartridge is there are only 4 layers for each image.
Just use the Tri-booklet and follow the row across, left to right.
Quick and Easy!

Base - dial size, select image and cut
Shadow - shift, select image and cut
Layer 1 - select image, layer and cut
Layer 2 - shift, select image, layer and cut


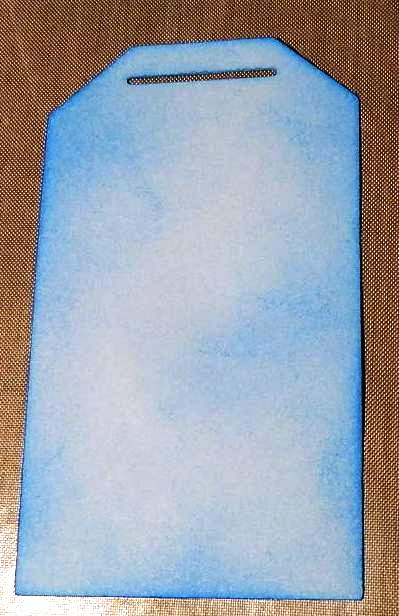
These are the pieces I cut using 4 papers and the Tea Time image, cut at 3" to make the tag below.
You can use the two inner pieces to create a second tag from this cut.


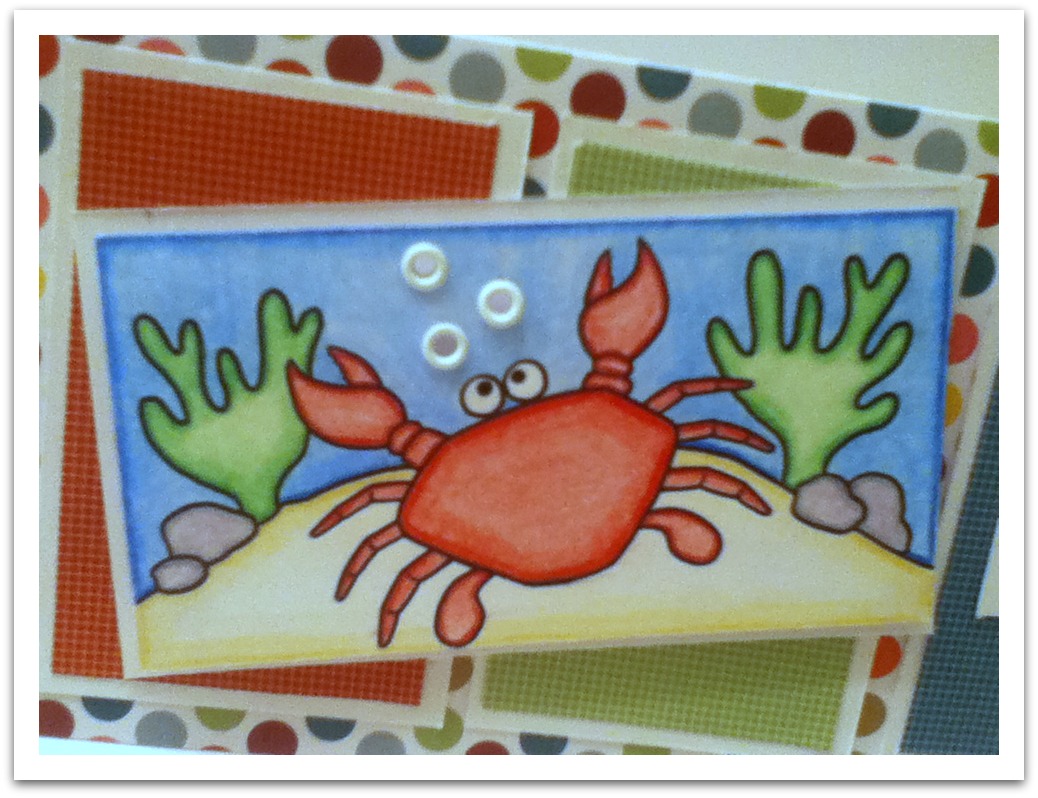
I also wanted to share two other cards I made, months ago, when I first received my cartridge.


Thank you for stopping by today and joining me for "Do You Speak Cricut Saturday".

Catch the Frenzy! - Karen

Friday, June 22, 2012

Digi Haven Challenge #3 - Summer

Digi Haven is back with their third-ever weekly challenge! So far the challenges have been a big hit and it's so fun to see what participants create using free digis they find. If you've never heard of Digi Haven, it's a brand new weekly challenge blog that requires using a free digital stamp on each project.  As a design team member, I've had a lot of fun searching for free digis to use for each of my challenge cards.

This week's challenge is all about summer, and what food says summer more than watermelon?


The final turnout of my card didn't turn out exactly the way I had originally pictured it, but when does it ever? :) I found this cute and simple watermelon digi here and paired it with some polka dot paper and a fun sentiment. 

Seen any free summer-themed digis lately? Print 'em out, give 'em some color, and enter them into this week's challenge! :)

Ashley

Thursday, June 21, 2012

Stamping with the Dragon Transportation Challenge

Boy, has it been a crazy week! I can't believe it's Thursday already. I honestly don't know where the time goes in the summer - every night before going to bed I think how I was JUST getting ready for bed the night before, and whatever I did during the day feels so far away. The good news is that I almost have all my cards done for the rest of the month (which is really only a week away) and then it's time to get started on all my cards for July, my goal is to be at least two weeks ahead of upcoming challenges, hops, etc., so in the fall when classes start up again I won't have to make cards last-minute all the time. We'll see if I can pull it off! :)

I created this card for the travel challenge over at Stamping with the Dragon, a new design team I started on a couple of weeks ago. I love their adorable dragon digis! This week's transportation challenge requires participants to create a card featuring some form of transportation. I chose to use the Rupert Goes Fishing Take 2 image to create this simple masculine card.


I'll admit I'm not too pleased with the way the pictures turned out, but hey, you win some and you lose some, right? To me the image was very calm and tranquil so I decided to make the card itself the same way by not making it too busy looking. The papers are from the Bold Basics paper pad by Recollections and I colored Rupert with my Prismacolor pencils. The blue bow looks much brighter in the picture than it actually is.

Stamping with the Dragon is sponsoring their challenge this week, and one lucky winner will receive two images of their choice from the store. Click here to enter the challenge and see what inspiration the rest of the design team has created for you! :)

Thanks so much for stopping by!
Ashley

Thursday Craft 'n Chat - Using Tim Holtz Distress inks to Make Backgrounds

Welcome to this week’s edition of Thursday Craft 'n Chat. Every Thursday will feature a different crafty tip/technique from one of the Made Especially For You design team members. Click here to view last weeks tutorial on how to make a wine glass tea light shade.


Hello everybody, this is Cyndy from Arcy Scraps
Welcome to another Craft 'n Chat Thursday! 

Today I have a mini picture tutorial on ways to use Tim Holtz Distress Inks to make your own backgrounds. 
All of these tags are from the Tags, Bags, Boxes & More cartridge
They're cut at 2.75" width (That's right, width LOL, I was working with some scraps)

 Technique 1: 
 Get the foam applicator, ink it up, and start adding ink to your paper! 
(This one is Salty Ocean from the Summer seasonal set, I ♥ the colors in this set)

You can keep adding more color until you get the look you like. 

You don't have to necessarily use one color, you can use as many as you like!  

 Technique 2:
Rub the ink pad on your craft sheet lightly. 

Then use your mini mister to spray some water.  

Just press your paper on it and use a heat tool to dry it up. 
You can keep adding colors until you're satisfied with the look of it.  

 Technique 3:
This is pretty much the same as technique one. Just add the colors you want on your tag. 
 Lightly splash water to create this blotchy look. 
I mean lightly, otherwise you'll get big blotches like this one. 
You can use a small brush, dip it in water, and create your blotches. 

 Extra:
Who says these inks are limited to paper?
Check these primas out! 

 I just inked them up with Vintage Photo Distress Ink. 

Here's the final look for a vintage look.  

P.S. 
You still have time to join this week's three eyelet challenge!
Check it out here

Cyndy

Tuesday, June 19, 2012

Card Creating Tuesday - Kid's Birthday


Welcome back for another Card Creating Tuesday at My Cricut Craft Room! This week's card-creating theme is all about kid's birthday cards. I think kid's birthday cards are one of the most fun types of cards to make because of the fun colors, die cuts, sentiments, and papers that can be used - who doesn't want to be a kid?

I created a girl's birthday card for this week's theme using two die cuts from the Create a Critter cartridge:

The sweet poodle is cut at 3.25" and the even sweeter cupcake is cut at 2.5"


I embossed the poodle's fur and the cupcake frosting with the D'vine Swirl embossing folder, and added a couple of white gems to the poodle's bows. The card was super fun to make and I love how delicious the background paper looks! 

Make sure to stop by My Cricut Craft Room to see other fabulous kid's birthday cards created by the design team!

Thanks for reading!
Ashley

Monday, June 18, 2012

Three Eyelets Challenge

Happy Monday, fellow crafters! It's time for another "especially three" challenge here at Made Especially For You! This week's challenge is to create a card featuring three eyelets.

Believe it or not, I had never used eyelets up until this challenge. Brads, yes, but eyelets, nope. I only started making cards last summer (my one-year blogaversary was this past weekend - June 17) and still have lots of new products to try. :)

Here's what I came up with for this week's challenge...


I found this adorable free crab digi here and colored him with my Prismacolor pencils. All papers (with the exception of the white cardstock) are from the Bold Basics paper collection by Recollections. I used three eyelets as bubbles above the crab's head rather than coloring the bubbles that were originally part of the image. It's fun to get creative once in a while. :)

Submit a card to this week's challenge for a chance to win a set of stamps from our sponsor, Whimsical Designs! One randomly chosen winner will also be offered a one-week guest designer position, and the top three submissions chosen by the design team will receive a badge to display on their blogs.

Stop by the Weekly Challenge page to play along with us and see the beautiful cards created by the design team!

Ashley

Saturday, June 16, 2012

Do You Speak Cricut Saturday - Paper Doll Dress Up

Welcome to this week’s edition of Do You Speak Cricut Saturday. Every Saturday will feature a different Cricut cartridge review from one of the Made Especially For You design team members. This feature was added to the blog in order to give potential cartridge buyers a better idea of what each cart has to offer. Click here to view last week's Paisley cartridge review.
   
Hi everyone,  Robin here from The Cricut Scrapper and I hope you are having a great weekend!
  
The cartridge that I wanted to feature is one of my all time favorites!! Paper Doll Dress Up, this cartridge is one of the first cartridges that I purchased and I use it over and over again.


This cartridge has just about everything. It is great for any kind of theme that you are working with, western, Thanksgiving, halloween, wedding, and christmas, just to name a few. (Believe me I could go on and on...but, I'm gonna try to keep this sort of short, lol) Let me just show you what images this awesome cart has to offer...


...and this picture really doesn't do it justice, if you want to see the handbook you can go here.


Now, you start off with your basic doll and just dress it up, hehe. It also has awesome accessories to go with whatever doll you are wanting to make for your card, layout or whatever project you are working on. For example if you wanted to make a cute little princess to go on a layout that you are making of your little princess in training :) You just cut out the doll, add the hair, dress, and shoes and there you have your oh so cute princess. But wait, there's more! You can also add a cute little crown, frog necklace, or even a castle to make your project even cuter! They also have a prince or a knight in shining armor if you need one of those, lol.

There are also some great borders on the last page with a fence, stars, waves and other great cuts. Here are a few cuties that I made to show you...
You can add some doodling, glitter, or leave them plain just the way they are cut (I did all three here to show you) either way they are just too cute. 

This cartridge has 6 features: Headwear, Accessories 1, Accessories 2, Accessories 3, Tabs, and Blackout.


If you have any small children that like to play paper dolls the tabs feature is for you,  you can cut out your paper doll and make the clothes to interchange on them! 

Now I wanted to show you a couple more thing before I go. This is a card I made for Thanksgiving with my little pilgrim girl...


...and this is a Halloween layout I did using the cute ghost from this cartridge:

If this is one of the cartridges you have been on the fence about, just hop on over you won't be disappointed :)

Thanks so much for stopping by
(:(:Smiles:):)
Related Posts Plugin for WordPress, Blogger...